FTC disclaimer: This post contains affiliate links and I will be compensated if you make a purchase after clicking on my link.
Ownership of files and folder in Windows 10 is crucial when you like to see the inside content or want to do some modifications.
If you have created any folder or files in Windows, then the ownership of that particular files and folder will be credited to you.
Why ownership of that particular files or folder are given to you?
Because, you are one of the logged in user and the files or folders are created by you.
What if it has been created by other logged in users?
In such case, you have to change the ownership of files or folders. Once you have changed the ownership, you are ready to get access to files or folders.
You may find that some of the files or folder in a system are not accessible by you. Like, for an example “WindowsApps“, “ProgramData” and many more. Also, these files are hidden from regular use.
Whenever, you will try to open it, it will prompt a message “You don’t currently have permission to access this folder“. So, to get access you have to click “Continue” to permanently get access to this folder.
Is it so easy to get access to this folder?
No, you need multiple steps to process the ownership of these folders and files.
The same thing you will experience whenever you try to open the folder or file from other hard disks. It may have possibilities that you have transferred data from external hard disk to your current hard disk.
By doing so, you won’t get ownership of that particular file or folder.
Why you need to take ownership of files or folders?
It may have possibilities that the user account who had created those files or folders had been deleted. Or, you might need to edit file like Notepad which has been created by other users.
These are the situation where you need to take the ownership of a file or folder.
Whatever be your reason, we will discuss here an official way to take ownership of files and folders.
What are the preconditions to take ownership of file and folder?
The only necessary precondition is; that you must be a logged in user and has an administrative privileges to do so.
Ownership of a file or folder
Let’s dive in to the steps that are needed to process the ownership of a file or folder.
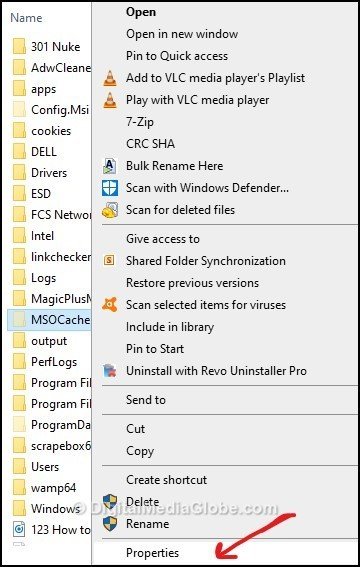
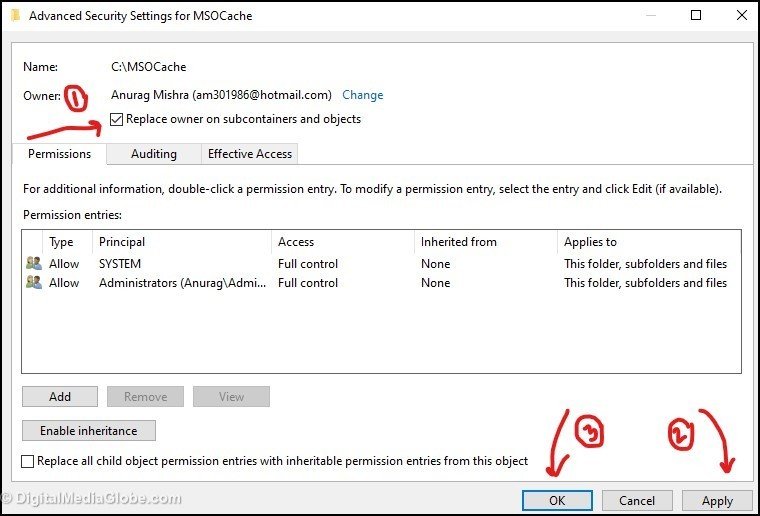
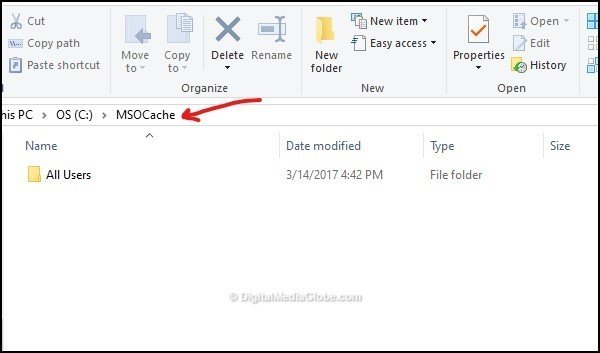
Here, we have taken one system folder “MSOCache“. MSOCache is a microsoft office source installation files that was a hidden folder in a C drive.
Now, you don’t have permission to open the folder and to look after the files or folders. Firstly, we need to change the ownership of files or folders to get access to it.
Step 1: Right click on folder and click on “Properties” from the context menu.
Step 2: In properties window, switch to “Security” tab and then click on the “Advanced” button. It will open the “Advanced Security Setting” window.

Step 3: In “Advanced Security Setting for MSOCache” click on “Change” to open “Select User or Group“. Initially, it will be showing “Unable to display current owner“.
It means the user is not from this system. And, the current user has no right to see the content of the folder. By clicking on “Change” we are in the process of changing the ownership of the folder.
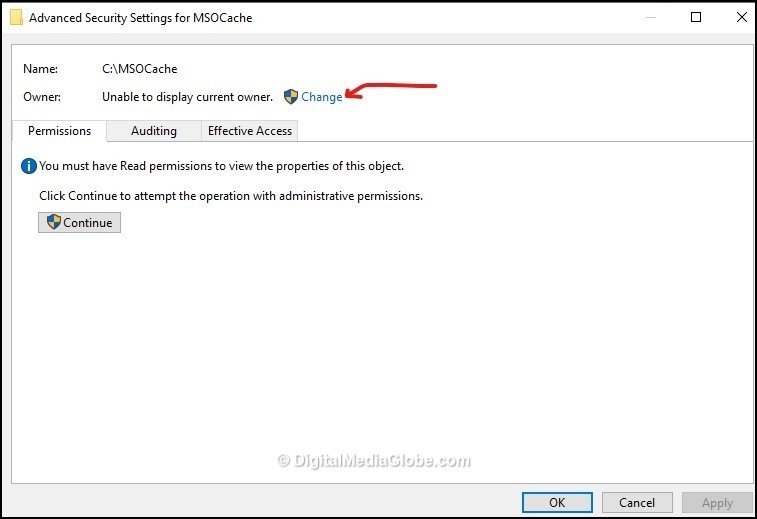
The window also specifies that “You must have Read permissions to view the properties of this object“. It means there is no administrative permission for you.
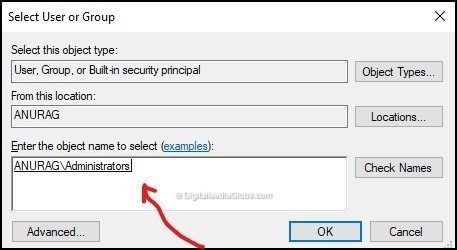
Step 4: In a “Select User or Group“, you need to fill the box “Enter the object name to select“. Here, you can put “Administrators” and then click on “Check Names“. It will search for the user account and put the exact account user.

As you can see, it has put a full user name path with the PC name before it.
Alternatively, you can also put Microsoft account email ID, if you are using Microsoft account to login to your system and Windows Apps store.
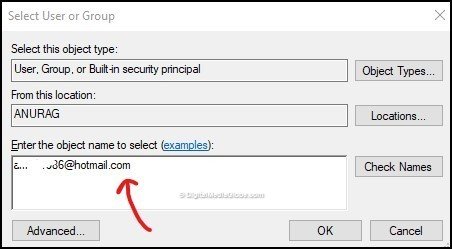
It will automatically search for the existing account and replace it with full name with email ID.
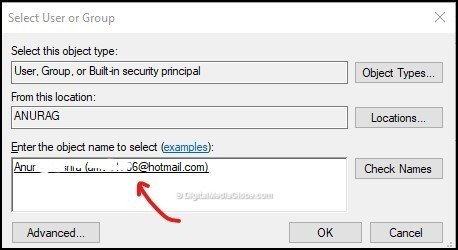
At the end, click on OK to make the changes.
Step 5: Next, it will open window of “Advanced Security Setting for MSOCache“. Here, you will find changed owner. Now, you need to check “Replace owner on subcontainers and objects” and then click on “Apply” for changes.
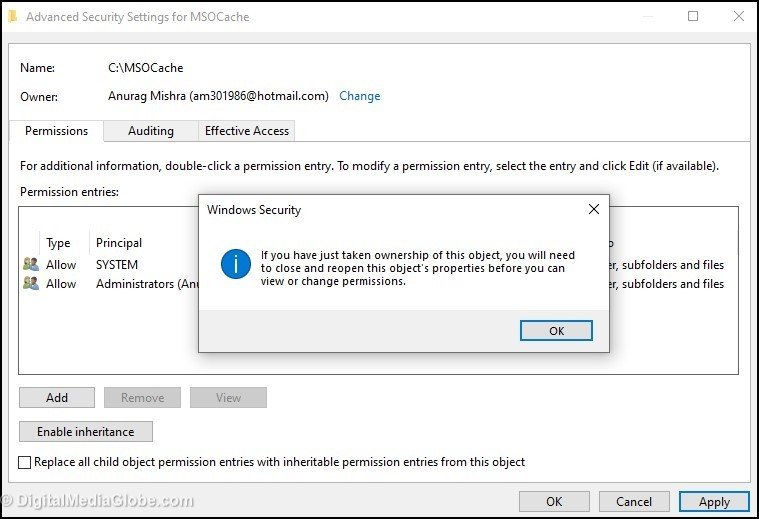
Step 6: Windows Security will prompt a message “If you have just taken ownership of this object, you will need to close and reopen this object’s properties before you can view or change permissions“. Click OK.
Step 7: Subsequently, you can now open the folder “MSOCache“.
Similarly, you can change the ownership of any file or folder and can get the access to it.
Hope, the above guide has helped you understand how to change full ownership and get access to files or folders.
If you have any doubts or have queries similar to this, you can contact us through the comment section.