FTC disclaimer: This post contains affiliate links and I will be compensated if you make a purchase after clicking on my link.
In Windows earlier versions such as Windows 7, you can easily boot your Windows in safe mode using the F8 key. This is a somewhat easy procedure by pressing F8 repeatedly when Windows starts loading.
But, with Windows 8, Microsoft has disabled the F8 option to speed up the booting process.
Moreover, the good news is you can easily enable the F8 key to boot Windows 10 in safe mode.
However, you should remember that by enabling the F8 key in Windows 10, it will slow down the booting process.
So, if slowing down the booting process doesn’t matter then follow the procedure below.
While later on, you can disable F8 Advanced Boot Options in Windows 10 if it is not needed.
Enable or Disable F8 Advanced Boot Options in Windows 10
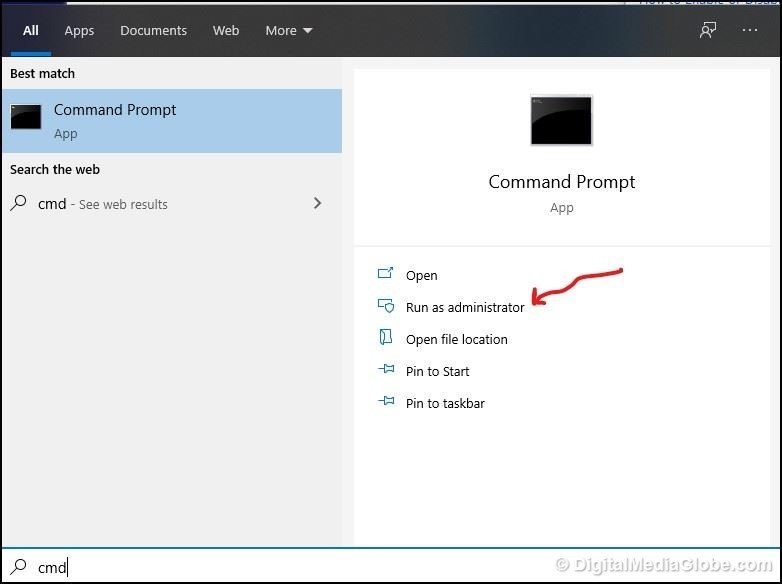
Step 1: Press Win + S, and then type in CMD. After that click on “Run as administrator“. It will open Command Prompt.
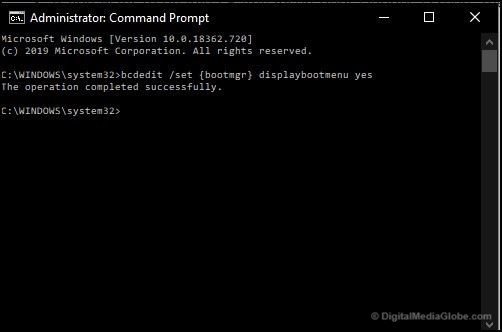
Step 2: If you want to enable F8 Advanced Boot Options screen then type in below command in a command prompt.
bcdedit /set {bootmgr} displaybootmenu yes
Step 3: Similarly, if you would like to disable the F8 Advanced Boot Options screen then type in below command in a command prompt.
bcdedit /set {bootmgr} displaybootmenu no

That’s all. This is how you can enable or disable Advanced Boot Options in Windows 10 or in Windows 8.
Now, whenever you start your PC, press F8 repeatably until the “Advanced Boot Options” menu appears.
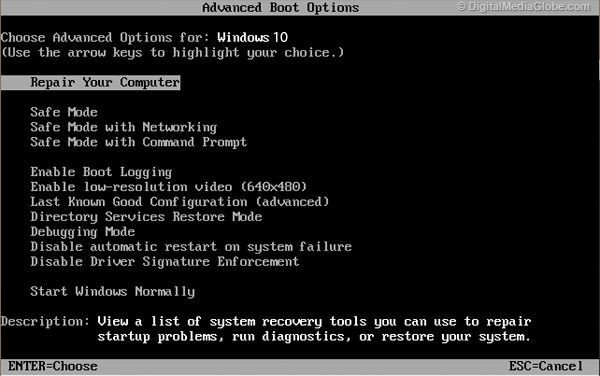
From here, you can select Safe Mode or Safe Mode with Networking to start the booting process in safe mode.
Thus, how you can enable or disable F8 advanced boot options in Windows 10.