FTC disclaimer: This post contains affiliate links and I will be compensated if you make a purchase after clicking on my link.
Checking the wireless network name and password is important when you are connected with the wireless network.
The wireless network name is also called SSID, which is set default by your ISP or kept when setting up a wireless network.
Also, you need to understand that a wireless network password is different from a router password.
The wireless network password is used to connect devices to a wireless network, whereas the router password is used to login to the router’s web interface.
We will look into the different ways to get the wireless network name and password.
How to change your wireless network name and password using a router?
Login to your router’s web interface
Step 1: To launch your router’s web interface, you have to look for the default gateway IP address or router IP address.
The most common router IP addresses are:
- http://192.168.1.1
- http://192.168.0.1
- http://192.168.0.254
- http://192.168.1.254
- http://www.routerlogin.net
- http://www.routerlogin.com
If it still doesn’t work, then refer to your Wi-Fi modem or router user manual.
Step 2: Enter your router or modem login credentials. The most common default username and passwords are admin and password.
If the above login doesn’t work, then refer to your router owner’s manual.
Step 3: The router’s web interface will look different for a different model of your router. Here, we have taken Linksys router example.
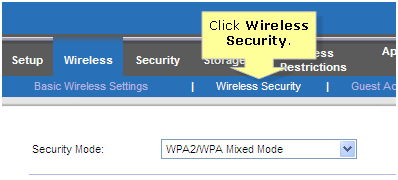
In Linksys router, you have to click on the “Setup” page and then click on “Wireless.”
Step 4: In the wireless section, set the “configuration view” to “manual” to view your wireless network’s current settings.
Here, you can note down Network Name (SSID) and keep the “SSID broadcast” Enabled so that your wireless device can detect the router in a network.
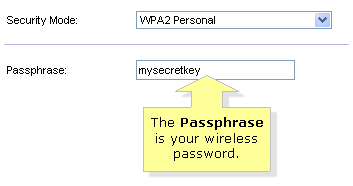
Step 5: For wireless password, you need to click on “Wireless Security,” then look for “Security Mode” for wireless security type and the “Passphrase” for wireless password.
How to change your wireless network name in the computer’s operating system?
Checking network name and password in Windows 10
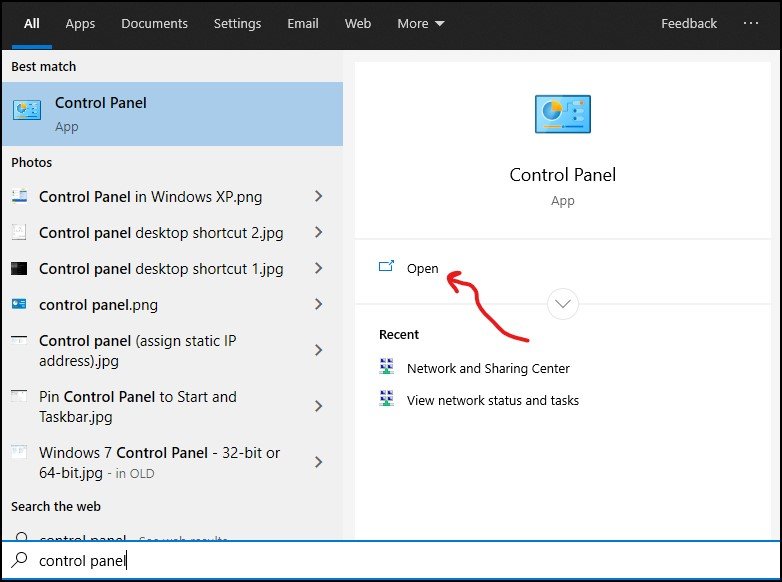
Step 1: Press Windows key + S and search for “Control Panel,” and then click to open it.
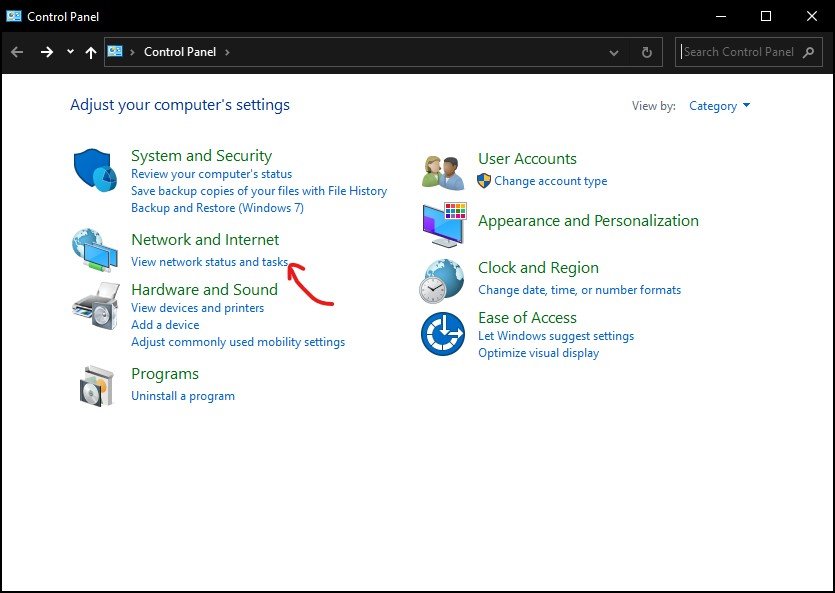
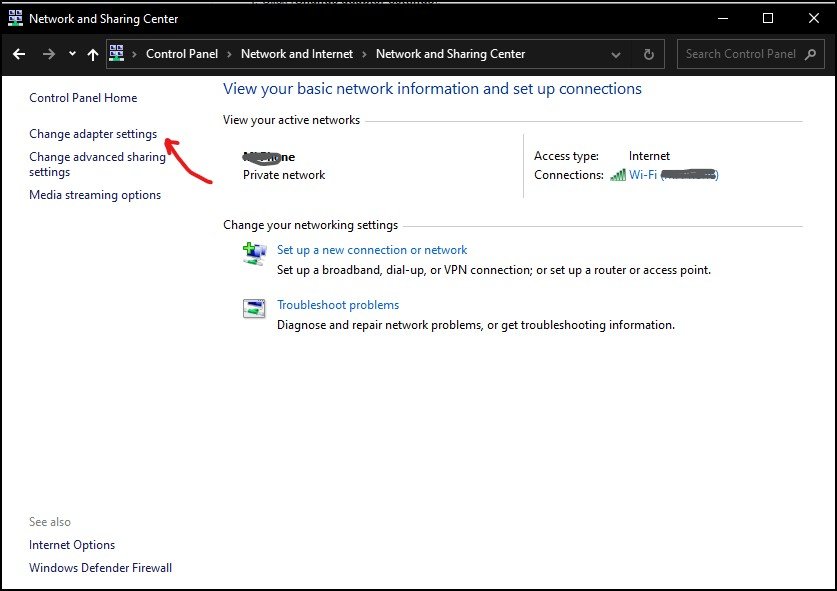
Step 2: In the control panel, click on “View network status and tasks,” it will open “Network and Sharing Center.”
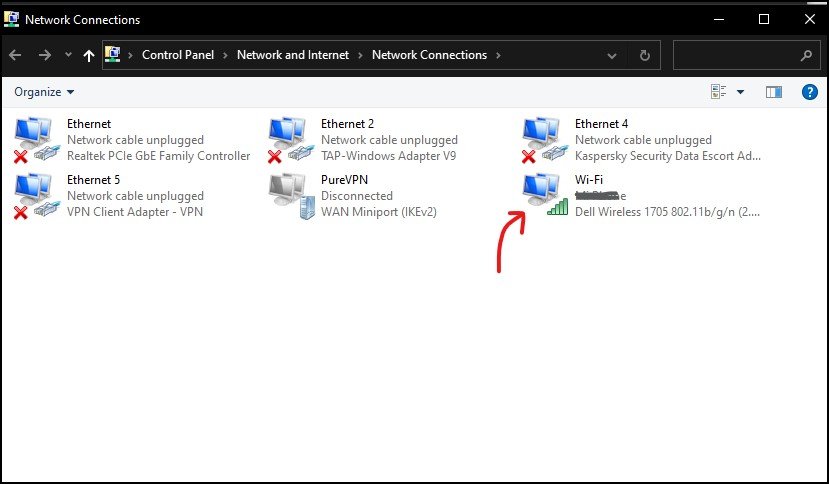
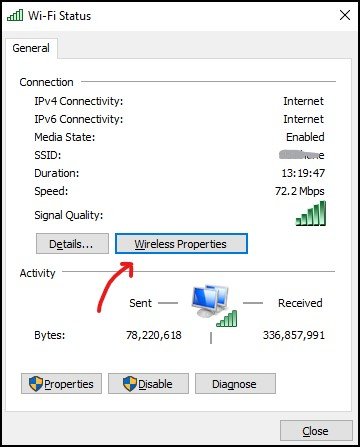
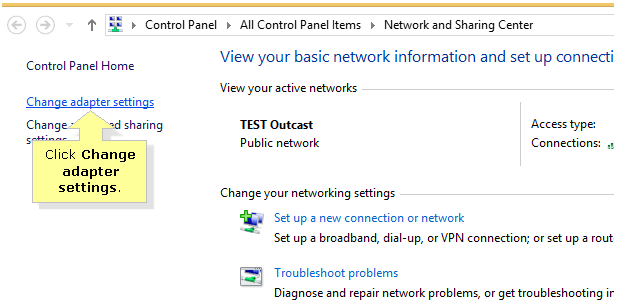
Step 3: In-network and sharing center window, click on “Change adapter settings” and then double-click on Wi-Fi to open “Wi-Fi Status.”
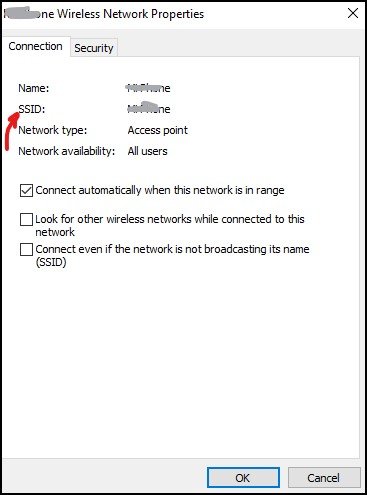
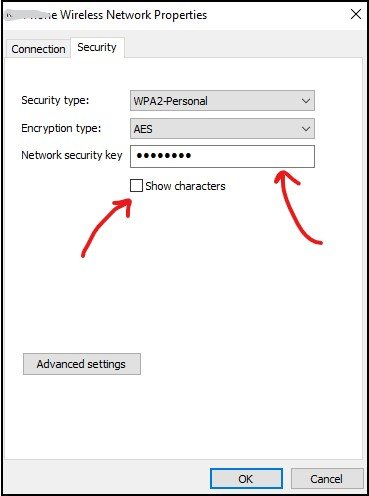
Step 4: In the open window, click on “Wireless Properties.” In the wireless network properties window, you have to look for “Network Name” or “SSID” in the “connection” tab and wireless password in the “Security” tab.
You can check the box to show characters and note it down.
Finding network name in Windows 8/8.1
Step 1: Right-click on the “Wireless Network Connection” icon located right to your taskbar. After that, click on “Open Network and Sharing Center.”
Step 2: On the “Network and Sharing Center” page, click on “Change adapter settings” on the right pane.
Step 3: Now, right-click on the wireless connection and then click on “Status.” In the Wi-Fi Status window, look for SSID for “Network Name.” After that, click on “Wireless Properties.”
Step 4: In the wireless network properties, click on the “security” tab and then check the box for show characters. It will show the network security key (network password or passphrase).
How to find network name and password in Windows 7/Vista?
Step 1: You have to click on “Wireless Network Connection,” located at the bottom of your screen.
Step 2: Now, right-click on the network name and then click on “Properties.”
Step 3: In the “properties” window, click on the “security” tab and then check the box to show characters to display “Network Security Key.”
How to check network name and password in Mac OS
You can check for the wireless password in two ways:
- Using keychain Access to retrieve the wireless password
- Using network utility to retrieve the wireless authentication
Moreover, the screens may look different for different versions of Mac OS.
Using keychain Access to retrieve the wireless password
Step 1: You have to click on “Go” and then click on “Utilities.” In utilities, double-click on “Keychain Access.”
Step 2: Under keychains, you have to click on “all items” for Mac OS X v10.5.x users or click on “log in” for Mac OS X v10.6.x and above to locate your Network from the list.
If your network is not listed, then click on “Passwords” or “System” to locate your Network from the list.
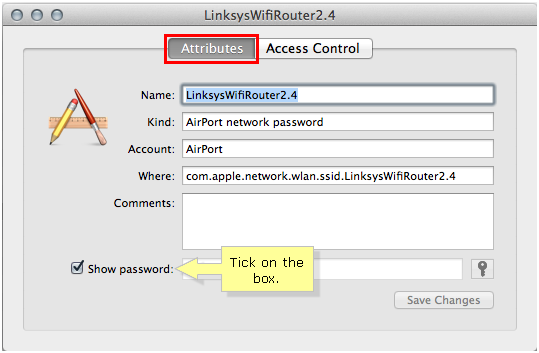
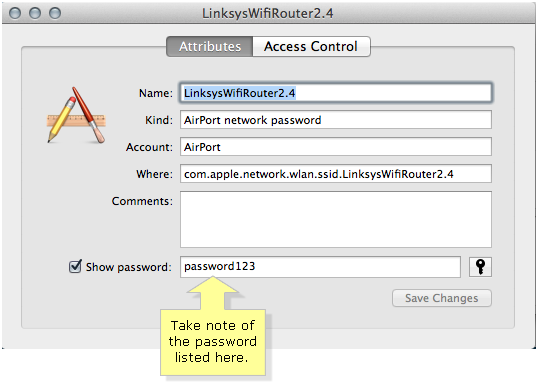
Step 3: Now, look for Network Name (SSID) and double-click on it to open another box. Here, click on the “Attributes” tab and then check the box next to “show password.”
Step 4: It will prompt another dialog box to enter the Mac administrator’s password or keychain password and then click “Allow.”
Step 5: Now, you can note down the displayed password required to connect to the internet.
Using network utility to retrieve wireless authentication type in Mac OS
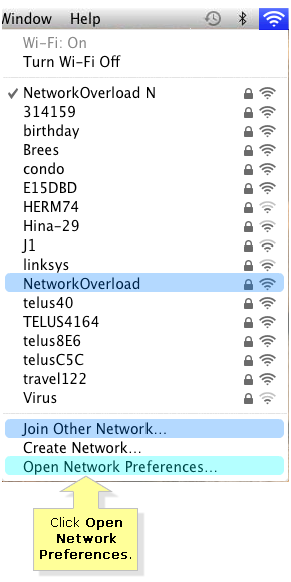
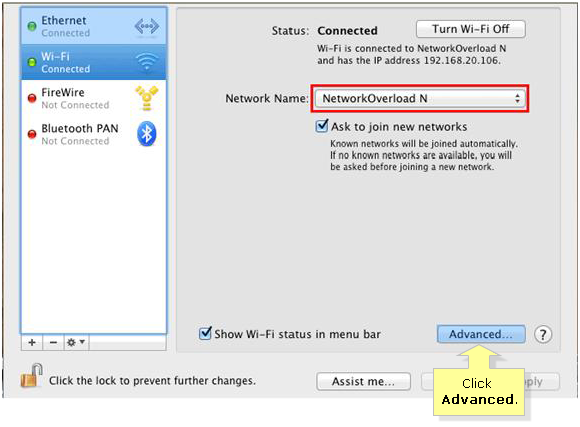
Step 1: In the menu bar, you have to click on Wi-Fi or AirPort. After that, click on “Open Network Preferences.” Now, click on the correct network connection.
Step 2: Here, you have to confirm the Network Name and then click on the “Advanced” button.
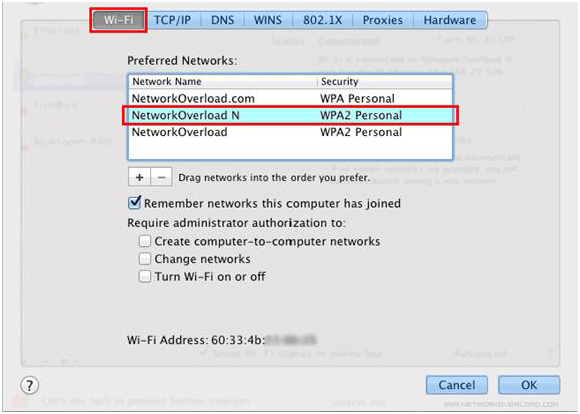
Step 3: In the Wi-Fi tab, look for the network name and security type on the preferred networks section.


