FTC disclaimer: This post contains affiliate links and I will be compensated if you make a purchase after clicking on my link.
Releasing and renewing an IP address in Windows is a procedure to reset the current IP address, or your computer doesn’t have an IP address.
You can refresh the IP address to eliminate common IP address-related issues.
What does it mean to release and renew IP addresses?
In some cases, you may face difficulty in connecting with your network. The reason would be that you are getting an invalid IP address from your router.
In other instances, you would be getting a self-assigned IP address that starts with 169, such as 169.254.x.x.
You have to renew your IP address by requesting the IP address from a DHCP server such as a router in both cases.
Also, to get a new IP address from the router, you have to flush or release the current IP address.
When you have to release and renew your IP address?
Normally, your device will run with your current IP address indefinitely.
When you first join the network, the router will assign an IP address using DHCP protocol.
But, you may face some technical glitches with DHCP and network hardware like a router. As a result, there would be IP conflicts and other networking problems.
There would be some scenarios where you need to release and renew your IP address.
- When you are connecting your computer to your modem directly.
- When moving your device from one network to another network, then IP conflict occurs.
- If there is network maintenance or network outage, then you have released and renewed the IP address.
We will look into the following operating system how to release and renew the IP address.
- Windows 10
- Windows 8/8.1
- Windows 7/ Vista
- Windows XP
Moreover, before releasing and renewing your IP address, you need to check whether your computer is connected with a router, either wired or wirelessly.
How to renew and release IP address in Windows 10
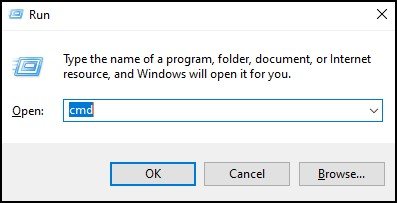
Step 1: Press Windows key + R and then type in CMD to open a command prompt.
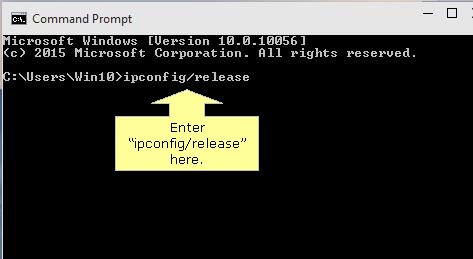
Step 2: In the open command prompt, you have to enter “IPCONFIG/RELEASE” and then press Enter to release your current IP address.
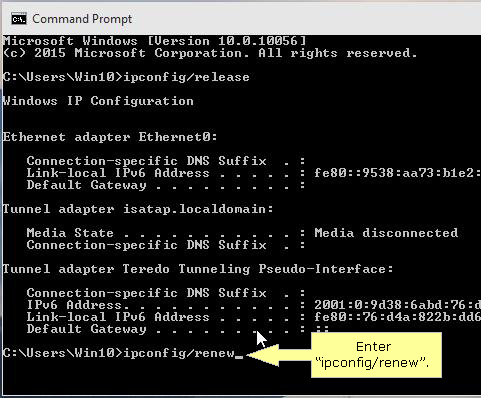
Further, you will notice no computer IP address in the Ethernet section and no IP address for Default Gateway (router IP address).
Step 3: Now, you have to enter another command to renew your IP address. Type in “IPCONFIG/RENEW” and press Enter.
How to release and renew IP address in Windows 8/8.1
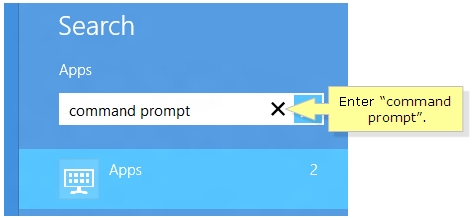
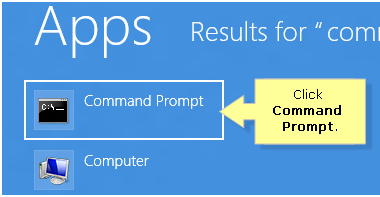
Step 1: Press the Windows key and then type in “Command Prompt” to display Command Prompt shortcut. As we will start typing, the search box will appear.
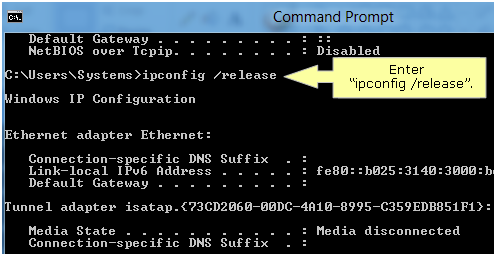
Step 2: The command prompt will appear as a search result. Click to open a command prompt and then type in “ipconfig/release” and then press Enter to release your current IP address.
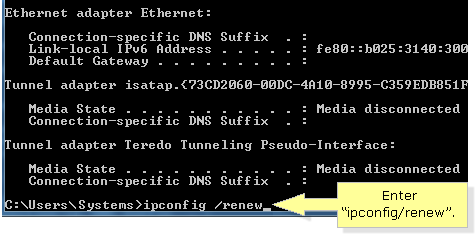
Step 3: After releasing an IP address, you have to renew your IP address. For this, you have to enter “IPconfig/renew” and then press Enter.
How to release and renew IP address in Windows 7/Vista
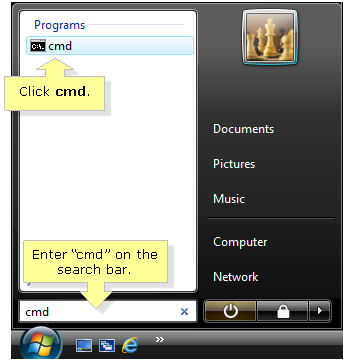
Step 1: Click the Windows start button and type in “CMD” on the search bar. After that, you have to click on CMD to open a command prompt.
Step 2: In the command prompt, enter “ipconfig/release” and press Enter to release the IP address. After that, enter “IPconfig/renew” and press Enter to renew the IP address.
How to release and renew IP address in Windows XP
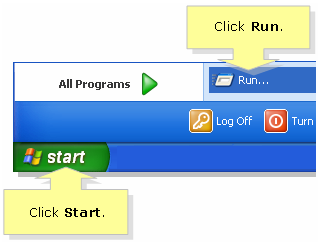
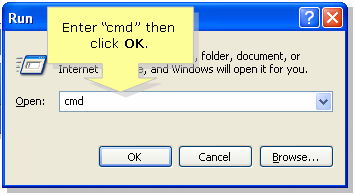
Step 1: You have to click on “Start” and then “Run.” In the Run window, you have to enter “CMD” and then click OK.
Step 2: In the command prompt, you have entered “IPconfig/release” and then press Enter. Now, it will show that the IP address becomes 0.0.0.0. Again, type in “IPconfig/renew” and press Enter to get a new IP address.
Conclusion
There would be a possibility that you may face an error while renewing the IP address.
The error message would be like “Unable to contact your DHCP server.” In such cases, try to restart your device and router and then try again.
You can also run Windows troubleshooting in Network and Sharing Center to diagnose the problem.
